Recently, CAE automation has become a hot topic due to its ability to increase the productivity of development teams and simplify data processing. The scripting feature first introduced in MASTA 10 enables users to write scripts that automate various processes within the software.
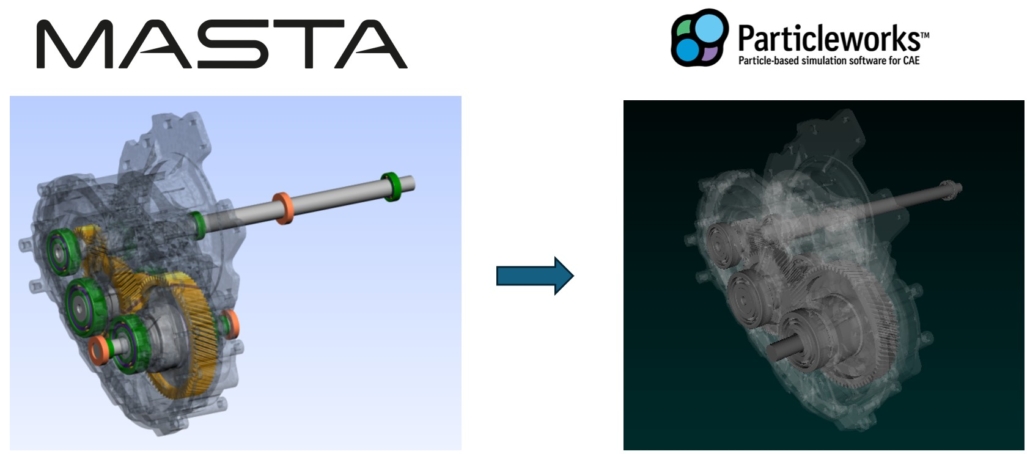
In SMT Japan, we assisted customers in creating an export script that transfers MASTA modeling information to Particleworks, a particle-based CFD software package. In this article, we will explain some key points encountered while developing this export script. We hope this will be informative for those working on similar projects and showcase the scripting capabilities of MASTA.
Figure 1: Data transfer concept from MASTA to Particleworks
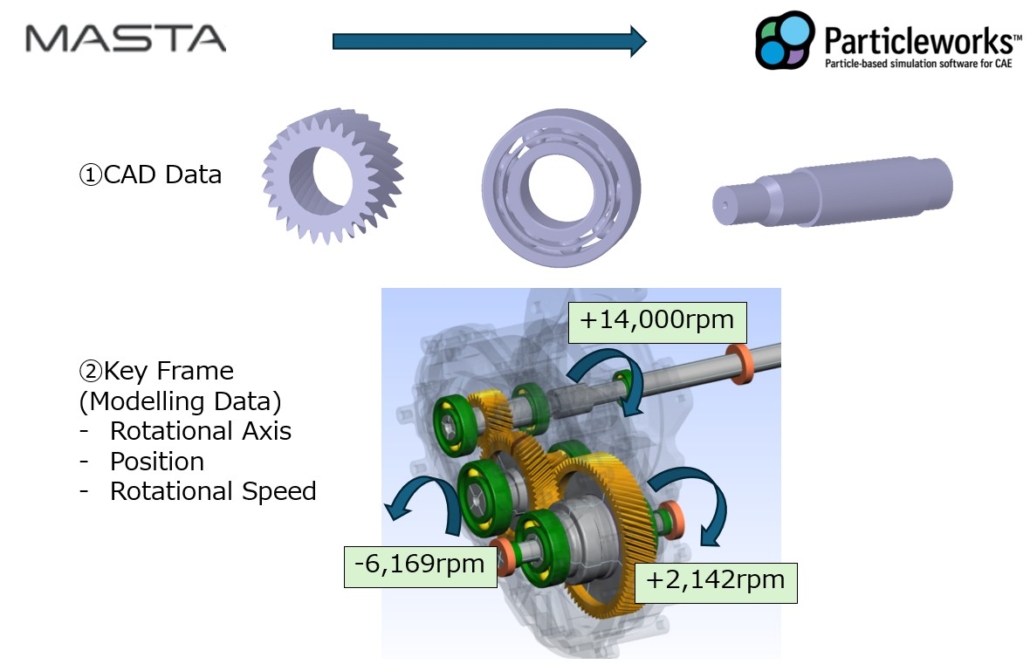
With the aid of this script, users no longer need to create another model from scratch if there is already a model in MASTA. For each MASTA part it creates modelling files (keyframe data* and stl file) required by Particleworks. The stl file contains the part geometry and the Key Frame data includes information describing how each parts rotates. In this article, we will go through the details of the script.
Figure 2: Details of Modelling Data needed for Particleworks
Modelling Data Export
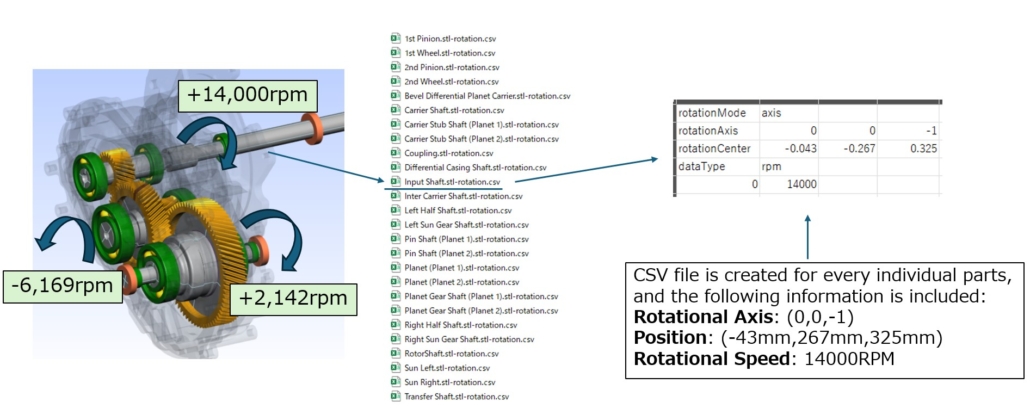
As shown in figure 2, a CSV file is needed for each part to define its behaviour. Each CSV file needs to contain three pieces of information: the rotational axis, position, and rotational speed of the part. The first two are available in MASTA while modelling in Design Mode. The rotational speed is available once the load case is set up and the Power Flow analysis has been run. Since a CSV file is needed for every single part, manually creating them all is quite impractical. We will demonstrate how to automate this creation process.
The process can be written as follows:
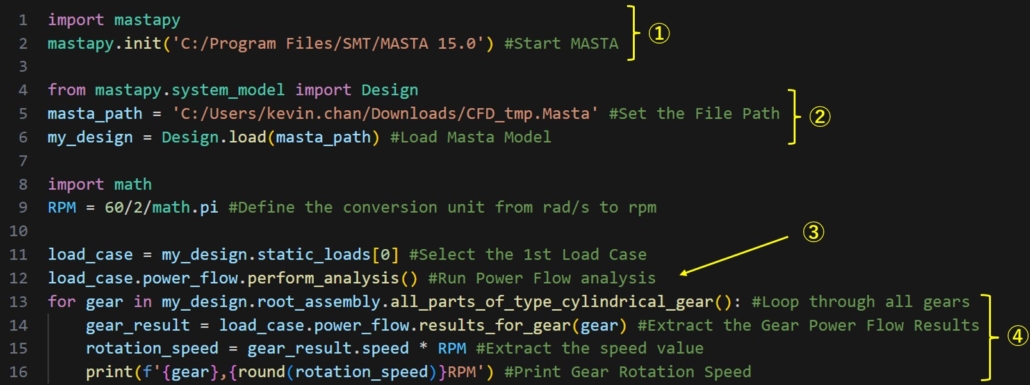
① Start MASTA > ② Open MASTA file > ③ Run Power Flow > ④ Extract the data
Figure 3: Modelling Data Script (Part 1)
In the script shown above, the text in green represents comments, which will not be executed.
In line 2, the mastapy package is initialised. Next, we define the path to the MASTA design in line 5. It is loaded in line 6, where it is named “my_design”. The first load case is selected (Note that indexing starts at 0) and a Power Flow analysis is performed on line 12. Starting from line 13, it loops over all the gears in the model and puts the Power Flow results into “gear_result”.
Next, the “rotation_speed” in rpm is calculated, and the code in line 16 will print the output.
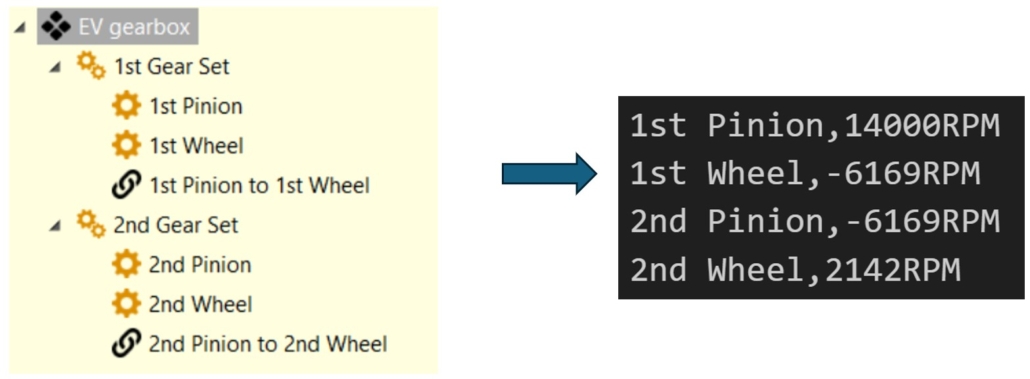
Figure 4: Modelling Data Script (Part 1) results
As intended, the script provides the names of the gears and their corresponding rotational speeds for the first load case.
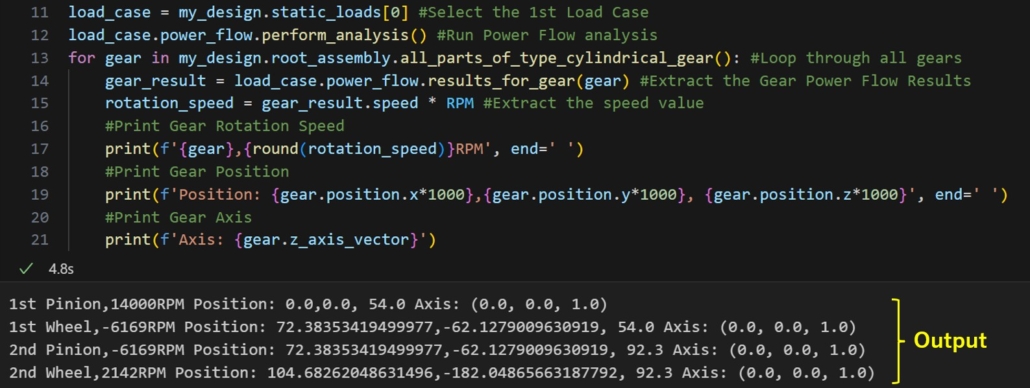
Figure 5: Modelling Data Script with more results
In Figure 5, we have added the commands to export the gears’ position and axis orientation.
Within the for loop (starting from line 13) it will print the information for each gear in the MASTA model (lines 17-21). In our example of exporting to Particleworks, we can directly create a CSV file instead of printing the values to the console.
CAD Export
Next, I would like to move on to the export of the CAD.
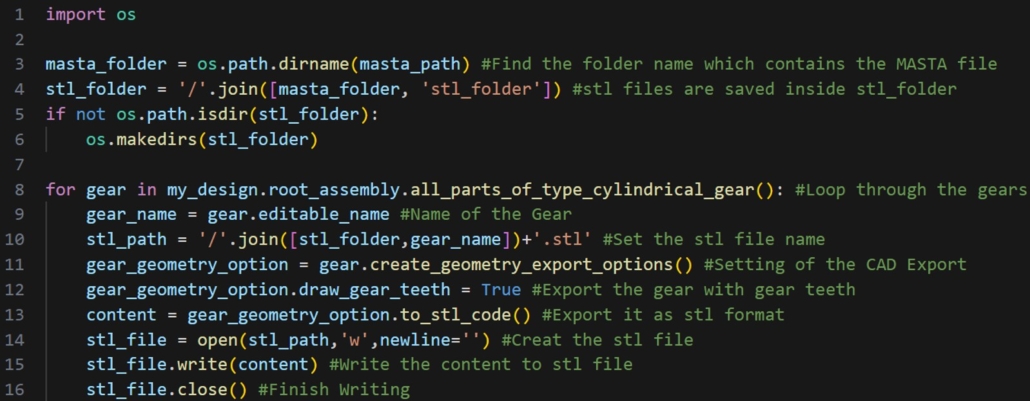
We can write the CAD export using a for loop as above in exporting the modelling data.
Figure 6: CAD Export Code (Part 1)
Figure 6 shows a sample script that exports the gear stl file. It utilizes the features of the MASTA module Basic CAD Export (ME101). We would like to highlight the draw_gear_teeth option. If this is not set to “True”, the gear teeth will not be generated, resulting in a smooth surface instead.
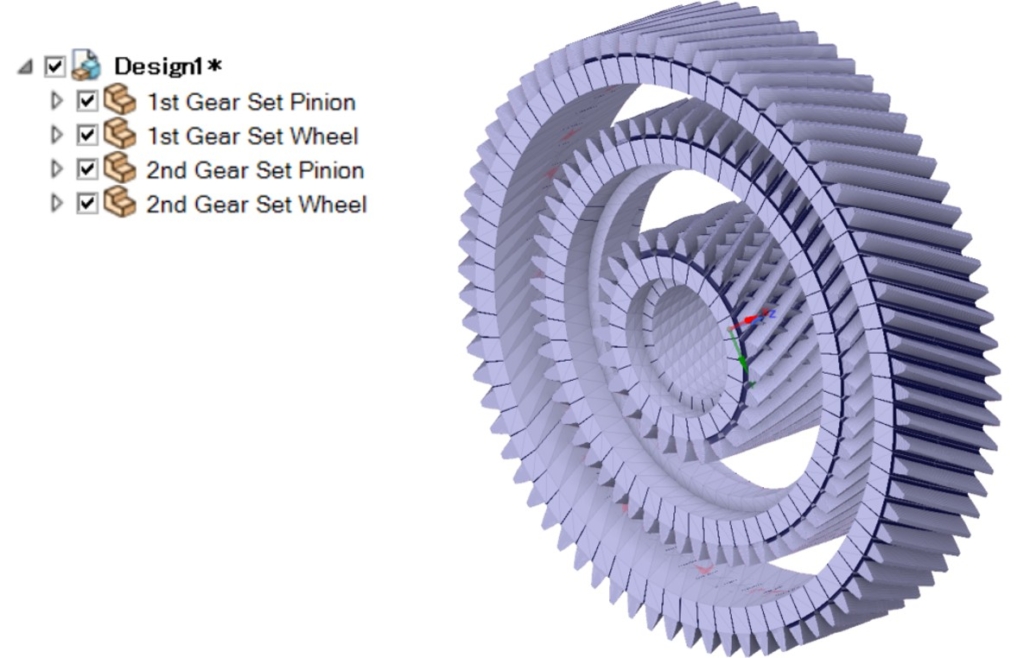
Figure 7 shows the result of the CAD export script. Since we have enabled the draw_gear_teeth option, the gear shape is accurately generated. However, one thing that is immediately noticeable is that all the gears are located at the origin.
Luckily in python, there are packages which help users to work with stl files. On this occasion, we will be using a package named “stl”.
Figure 7: CAD Export Code Result (Part 1)
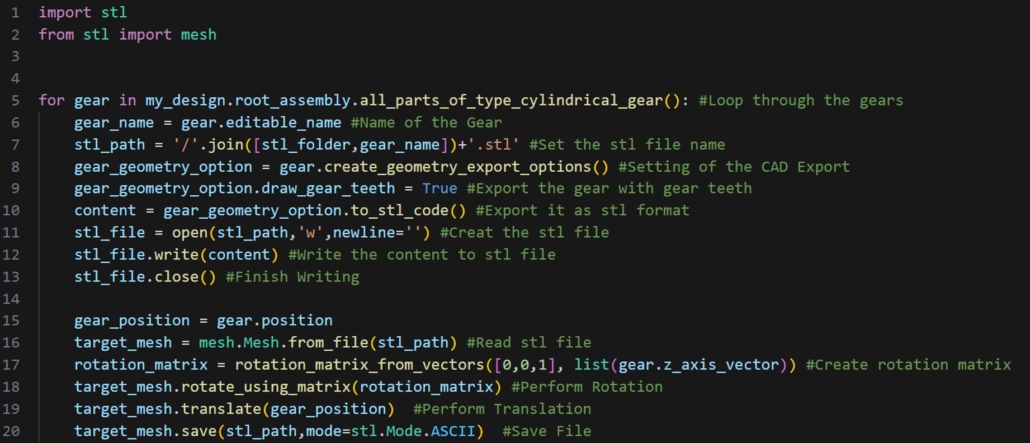
Figure 8: CAD Export Code (Part 2)
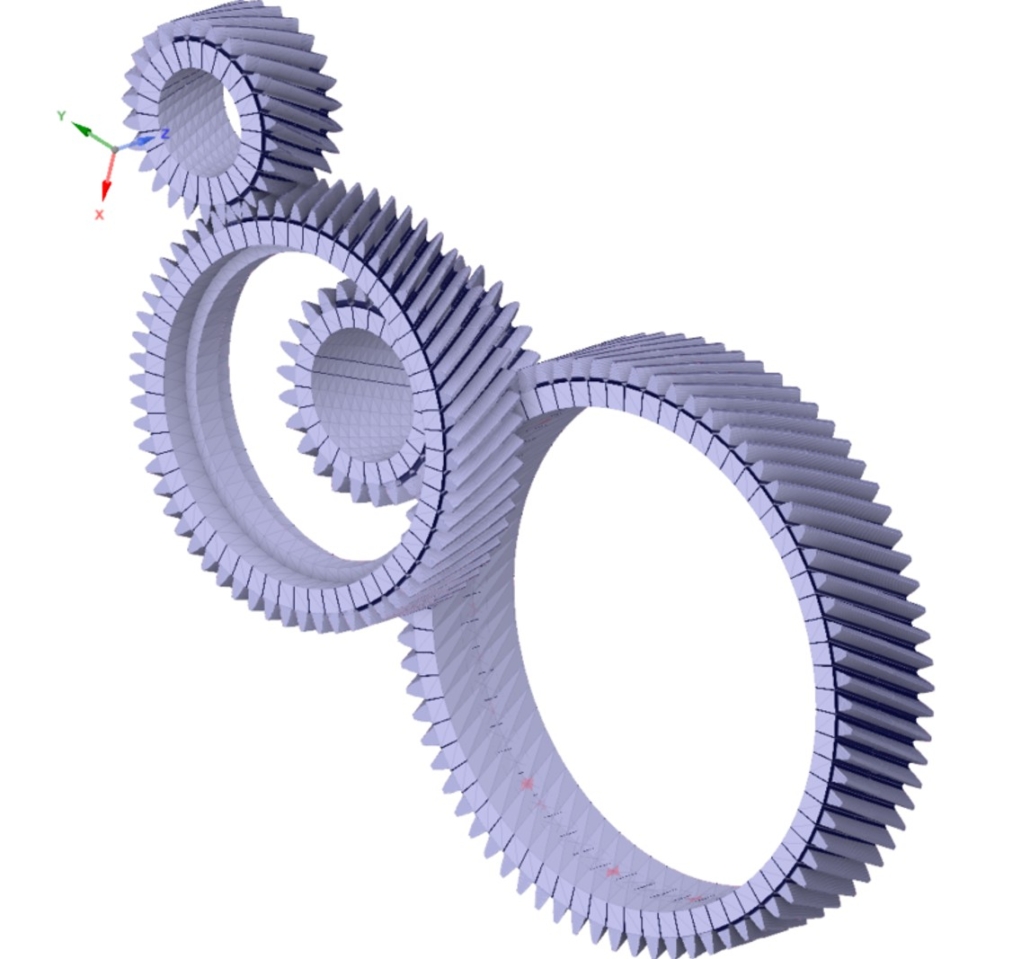
Figure 8 shows the updated CAD export code from Figure 6. We used the stl package, which is imported at the beginning. On line 15, we get the gear position from the MASTA design and perform the translation on line 19. On line 17 we create a rotation matrix from the MASTA orientation. This is used to rotate the gear on the following line. One thing that is easily overlooked is that we need to apply the rotation before translation. Otherwise, it will rotate the parts with an offset created by translation.
Regarding the “rotation_matrix_from_vectors” method used in line 17, it is inspired by python – Calculate rotation matrix to align two vectors in 3D space? – Stack Overflow. This is quite helpful if you are trying to create a similar method.
Figure 9: CAD Export Code (Part 2) Result
Conclusion
I hope this article has provided useful insights into how to extract data from MASTA using the MASTA API.
This process involves running analyses and extracting the necessary data for modelling. Additionally, for CAD export, we demonstrated how to modify the CAD file using a Python third-party package. Automating the modelling process saves time and helps avoid mistakes that can occur during manual work.
This script exemplifies the benefits that automation in MASTA can bring. Since MASTA supports Python, the syntax is easy to read compared to other programming languages, making it more accessible to first-time coders.
Thank You For Reading
In this blog we have introduced the Scripting feature in MASTA. If you are interested in more information or a demo, please get in touch.

